How Coil wrapping machine work for steel packing

Executive summary This video shows a coil wrapping machine packing a large steel coil in a single, easy-to-follow cycle: the operator loads the coil onto support rollers, lowers a top hold-down, and the wrapping ring applies overlapping layers of protective material around the coil’s outer surface. A fenced safety zone with an interlocked gate and an emergency stop protect the operator. After wrapping, the finished coil is lifted off and set upright on the floor. Note: cycle time, throughput, and size limits are not stated in the video — check with the manufacturer.

Why this matters for steel packing

Bare steel coils pick up moisture, scuffs, and edge damage in storage and transit. Wrapping a coil in a wide band of protective material — film, paper, or a composite wrap — keeps the surface clean and the edges protected until the coil reaches the next processor. Doing that wrap by hand is slow and inconsistent. A coil wrapping machine automates the rotation and material feed so every coil comes out with an even, overlapping cover.

The video on this page walks through one complete packing cycle on a machine built for exactly this job. If you are evaluating wrapping equipment for a steel service center, a wire or cable plant, or a metal processing workshop, the footage gives you a clear look at how loading, wrapping, and unloading actually work in practice.

What the video shows: the machine in action, step by step

The video follows one cycle from manual loading to a finished, wrapped coil. Here is what happens, with approximate time references from the footage:

  1. Loading (≈0–15 s). An operator bends down and places a large ring-shaped steel coil onto two support rollers at the base of the machine. The machine sits idle in standby, with a yellow mesh safety fence closed around the work area.
  2. Positioning and hold-down (≈15–18 s). The operator steadies the coil, then steps back to the control console. A yellow hold-down / guiding arm at the top of the machine lowers toward the workpiece and presses lightly, keeping the coil stable so it cannot shift.
  3. Wrapping starts (≈18–27 s). With the operator clear of the work zone, the cantilevered wrapping arm begins to rotate. The support rollers turn in sync, carrying the coil with them, and the wide light-colored wrapping material feeds off an overhead roll and lays down onto the coil surface along a curved path.
  4. Multiple overlapping layers (≈27–36 s). The wrapping arm keeps rotating at speed, completing several turns. The material covers the full circumference with visible overlap between the band edges — this overlap is what gives the coil a continuous protective skin.
  5. Finishing (≈36–42 s). The arm decelerates and stops. The end of the wrap material is secured, and the machine resets, ready for the next coil.
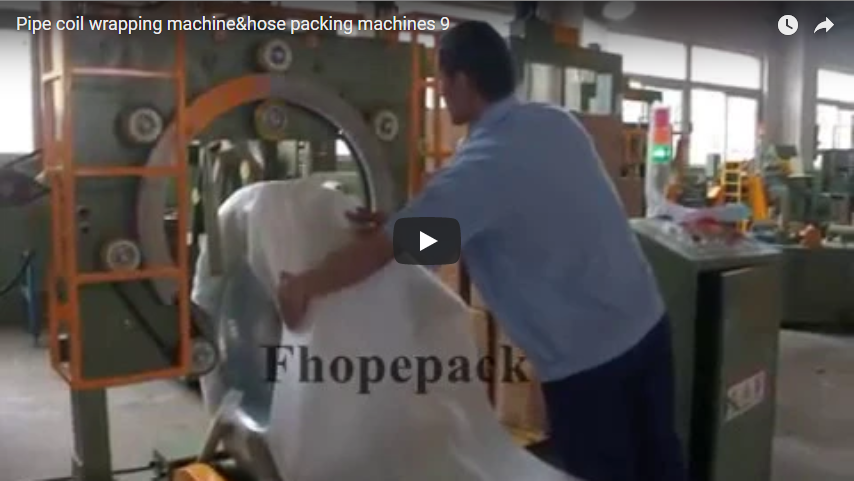
  6. Assisted finishing and unloading (≈45–72 s). Later in the video, an operator works at the machine, guiding and smoothing the wrap material around a partially wrapped coil — a manual assist step. Once wrapping is complete, the operator releases the workpiece, lifts the finished coil off the machine, and stands it upright on the floor. The wrapped ring shows a strip of yellow tape holding the cover in place.

The overall pattern is best described as semi-automatic: the machine does the turning and the material feed, while a person handles loading, positioning, and unloading. That split keeps the equipment simple and affordable, at the cost of needing an operator per cycle.

Direct observation notes

The block below stays close to what the footage actually shows, with only light grammatical editing:

  • The machine frame is a blue-painted steel structure; safety guarding is a fully enclosing yellow metal mesh fence over the work area.
  • Main components observed: two bottom support rollers (light-colored, anti-slip surface), a yellow cantilevered wrapping arm at the top with rotation joint and tensioning device, a material roll stand on the left carrying a large spool of light-colored band, and a grey-white control cabinet on the right with its door open.
  • Control panel: a vertical stack of red / yellow / green indicator lights, a red mushroom-head emergency stop button, green start and black reset buttons, selector switches, two small digital displays (readings not legible), and rows of relay / contactor modules inside the cabinet.
  • The workpiece is a large ring-shaped steel coil — dark grey / silver-grey with metallic sheen and light oxidation marks. Estimated proportions from the footage: outer diameter roughly 1 m scale (estimated from operator height comparison), with a central bore.
  • The wrapping material is a wide, light beige / pale yellow band, roughly 100 mm class in width; edges overlap slightly between passes.
  • Markings visible on screen: a corner watermark reading “FHOPEGROUP” with the tagline “PACKAGING SOLUTION FOR YOU”, and “FHOPE” lettering on the machine base and rollers.
  • During wrapping, the operator stands outside the fence and does not intervene. The machine starts only after the operator steps away.
  • After the cycle, the operator lifts the wrapped coil off and sets it vertically on the floor, where faint floor markings (yellow-black hazard line) are visible.
  • No automatic discharge, no robotic handling, and no automatic strapping are shown. The tape securing the wrap end appears applied by hand.

Control and safety features you can see

Two things stand out in the footage and are worth noting for anyone assessing shop-floor safety:

  • Interlocked fence. The yellow mesh fence fully surrounds all moving parts, and the video’s sequence implies a gate interlock: the machine begins its cycle only after the operator leaves the enclosed area. With the gate open, the machine should not run — confirm the exact interlock design with the manufacturer.
  • Emergency stop and signal tower. A red mushroom-head E-stop sits on the panel, and a three-color signal tower (red / yellow / green) shows machine state at a glance — useful when several people work nearby and need to know whether the machine is running, idle, or in alarm.

Practical safety notes for operators: always confirm the fence is closed before starting; never reach into the enclosure while the arm or rollers are turning, even if the wrap slips — hit the E-stop first; and test the emergency stop periodically. Wear gloves and eye protection when handling coils and wrap material.

What the video does not show

The footage is a demonstration, not a spec sheet. The following are not observable and must be verified directly with the manufacturer before purchase:

  • Rated power (kW), supply voltage, and frequency
  • Cycle time per coil and maximum output (coils per hour)
  • Minimum and maximum coil diameter, bore, and weight the machine accepts
  • Wrapping material options (PE film, paper, woven/composite) and thickness range
  • Machine model number, overall footprint, and weight
  • PLC / drive brands and available control interfaces (e.g., Modbus, RS-485)
  • Safety certifications (CE, ISO references) — no certification marks are legible in the video
  • Maintenance intervals, wear-parts list, warranty terms, and spare-part lead times

If you are comparing machines across suppliers, ask each vendor to put these numbers in writing. Video demos rarely show worst-case coils or material-change procedures.

Where this type of machine fits

Based on what the footage shows — manual loading, a single work station, and a coil in the small-to-medium ring class — this wrapping approach suits:

Good fit Think carefully
Steel service centers wrapping coils for storage or outbound shipment Very high-volume lines needing fully automatic load/unload
Wire, cable, and hose reels needing dust and moisture protection Oversized or extremely heavy coils (custom arm / station needed — verify limits)
Workshops wanting consistent, overlap-wrapped coils without a full packing line Operations expecting automatic material splicing or changeover
Sites with limited floor space and a need for fenced, guarded operation Buyers requiring vision-based inspection of wrap quality or coil diameter

If your volume grows, the same wrapping principle scales into a full automatic coil packing line with conveyor loading, automatic strapping, and stacking — the trade-off is cost and floor space.

Operator walkthrough summary

For training purposes, the cycle shown reduces to five habits:

  • Load the coil centered between the support rollers; a badly centered coil will wobble under the hold-down.
  • Close the fence and step clear before starting — the footage shows the machine waiting until the operator is out.
  • Watch the first wraps; overlap and tension are easiest to correct early in a cycle.
  • Never reach in during rotation; use the E-stop if anything goes wrong.
  • At the end, secure the wrap tail (the video shows tape used for this) before moving the coil.

FAQ

Is the machine fully automatic? The cycle shown is semi-automatic: an operator loads, assists, and unloads, while wrapping itself runs automatically. Check with the manufacturer whether higher-automation loading or discharge options are available.

What material is used for wrapping? The footage shows a wide, light-colored band; based on the appearance it is consistent with plastic film, paper, or a composite wrap. Confirm available materials and widths with the manufacturer.

How long does one wrapping cycle take? A full cycle is not measurable from the video because the footage includes manual assist steps and editing. Request a timed demo on your coil size.

What safety features does the machine have? Visible: full yellow mesh fence, an interlocked gate, a red mushroom-head emergency stop, and a three-color signal tower. Certification markings are not legible — verify compliance standards with the manufacturer.

Can it handle coils other than steel? The wrapping principle applies to any ring-shaped product of similar size — wire reels, cable drums, hose coils. Confirm size and weight limits for your specific product.

Pre-purchase verification checklist

  • Coil diameter, bore, height, and weight limits for your largest and smallest coils
  • Written cycle time and realistic throughput on your product
  • Wrapping material options, widths, and tension settings
  • Interlock and E-stop design details; applicable safety certification
  • Control interface options if you need line integration or monitoring
  • Warranty, spare parts availability, and local service support

Related reading

Next step

If the workflow in this video matches your packing needs, the fastest way to size the right machine is to share your coil dimensions, weight range, and target output with us. Send your details through our contact page and our engineers will recommend a suitable configuration — and answer the “verify with the manufacturer” items above in writing.

Contact FHOPE for coil wrapping options

Source and method

This article is based on a product video (YouTube ID: fZlSXDCy_lc). The footage was analyzed frame-by-frame using a local vision model on sampled frames. The video contains background music only — there is no narration or speech, so no transcription was used. All facts above come from what is visible on screen; anything not observable is explicitly marked for verification with the manufacturer.