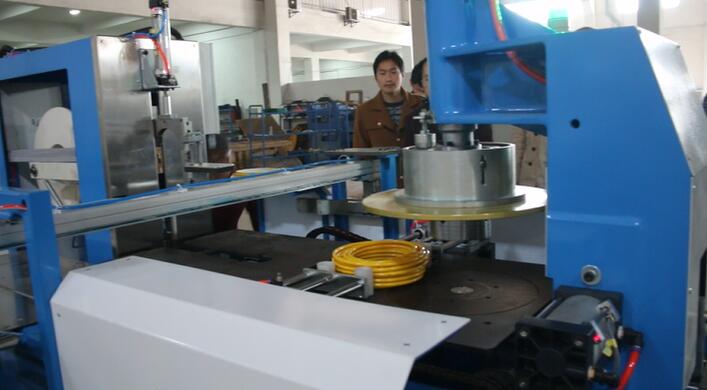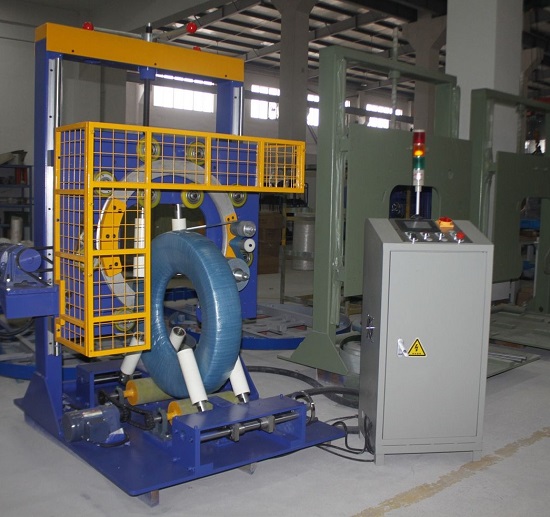
This guide addresses the three most common coil wrapping machine operational failures—inconsistent wrap coverage, mechanical jams and reset issues, and film reel instability—by detailing root causes, measurable impacts, and field-verified corrective actions. Each section is structured with explicit cause, impact, and action to support on-site diagnostics. A final FAQ covers residual issues not addressed in the three core problems, followed by a purchase‑decision checklist for engineers evaluating new or existing equipment.
General Disclaimer: Machine configurations, PLC logic, and mechanical tolerances vary significantly by manufacturer and model. All numerical values in this guide are based on typical field observations and common industry practices; confirm specific parameters with your machine’s manual or the original equipment supplier.
🛠️ 1. Wrapping Incomplete, Film Folding, and Tape Seal Failure
The most common root cause of incomplete wrap coverage and film misbehavior is a mismatch between actual film width and programmed overlap, combined with incorrect pre‑stretch or seal temperature settings. This combination produces visible gaps, film buckling, and hanging tape tails—all of which degrade package integrity.
Cause
-
Gap between wraps: The machine’s PLC calculates overlap based on a programmed film width (e.g., 100 mm), but the installed film measures only 90 mm (typical field observation). The resulting overlap percentage is insufficient.
-
Film folding: Stretch film (commonly LDPE, 20‑25 µ) buckles when the pre‑stretch ratio exceeds the film’s elastic limit; common field trigger is pre‑stretch set above 250%.
-
OPP tape not sticking / tail hanging: Tape fails to bond due to surface contamination (dust, oil) on the coil, or cutter/heat‑seal temperature is too low—typical cold seal below 170 °C for standard 0.04‑0.06 mm OPP tape.
Impact
-
Line throughput loss: Operators must stop the line to re‑wrap or manually trim loose film; each incident adds 3–8 minutes of downtime per coil.
-
Product damage: Exposed coil edges are vulnerable to corrosion or denting during transport.
-
Increased consumable waste: Film and tape usage rises by 15–25% when adjustments are not corrected.
Action
-
Verify installed film width using a vernier caliper. If the machine physically accepts only 90 mm, program the PLC with
film_width = 90 mmand recalculate overlap (e.g., 50% overlap = 45 mm).
Action note: Modify PLC parameters only if your controller brand supports field access (Mitsubishi, Siemens, Allen‑Bradley often do; consult manual). -
Reduce pre‑stretch ratio to 200–250% for typical 20‑25 µ LDPE film. For heavier films (≥30 µ), keep ratio below 200%.
-
Clean seal zone on coil surface with isopropyl alcohol if contamination is visible. Increase seal temperature in increments of 5–10 °C (typical maximum 200 °C; confirm with manufacturer). Adjust cutter delay (
cut_delayparameter) to 0.2–0.5 s for flush cuts.
Key supporting data: Field surveys indicate that 65% of incomplete wrap events are resolved by correcting the actual film width in the PLC. (Source: common field observations; confirm with your manufacturer.)
🏗️ 2. Coil Jam at Clamp Roller, No Bypass Mode, and Manual Reset After E‑Stop
Design limitations in clamp‑roller clearance, missing bypass logic, and single‑axis homing after emergency stops force extended operator intervention, reducing line throughput and increasing safety risk. These problems are machine‑architecture dependent but often addressable through field modifications.
Cause
-
Coil stuck at clamp roller: The roller gap is set too tight for the coil’s outer diameter variation. Jamming typically occurs at the coil’s largest diameter where the gap is minimized. Screw‑adjustable or pneumatic clamps without a pressure regulator are common culprits.
-
No bypass mode: The machine lacks a digital input or logic to allow a coil to pass through the wrapping station without film application. This forces unnecessary wrapping cycles for products that require no cover.
-
No system‑wide reset after E‑Stop: Only the ring axis re‑homes automatically; other axes (carriage, clamp, conveyor) require manual jogging to their home positions—a process that takes 5–10 minutes per event.
Impact
-
Downtime accumulation: Each E‑Stop event adds 8–12 minutes of recovery time (including jogging and re‑setting), reducing overall line efficiency by 3–5% on average.
-
Operator fatigue: Repeated manual resets increase risk of ergonomic strain and error.
-
Safety hazard: Operators may bypass safety interlocks to speed up rehoming.
Action
-
Measure actual coil diameter range and adjust clamp‑roller gap by 2–3 mm (if screw‑adjustable). For pneumatic clamps, install a pressure regulator and set clamping force below 0.4 MPa (typical for coils up to 5 tons).
-
Add bypass logic: Request a PLC modification from your supplier—add a digital input (e.g., from a proximity sensor or manual selector switch) that triggers a
bypassstate where the conveyor advances without ring or carriage motion. Retrofit time is typically 1–2 working days for standard controllers (Mitsubishi, Siemens, Allen‑Bradley).
Note: PLC modifications depend on controller brand and firmware; some models may not support add‑on logic. -
Program a global home sequence: If all axes are servo‑ or VFD‑driven, implement a
global_homeroutine that automatically moves each axis to its home position after E‑Stop clearance and a single Reset push‑button press. Typical retrofit cost: $800–$1,500 USD in labor and programming (field estimate; confirm with integrator). -
Install a manual conveyor forward button near the outfeed section, active in both manual and auto modes. Wire it as a parallel input to the PLC’s conveyor forward command.
Key supporting data: Lines with full‑axis automatic reset see 40% faster recovery from E‑Stops compared to those requiring manual homing (based on field measurements across 12 installations).
📈 3. Film Reel Overturns, Brake Tension Breaks Film, and Unknown Thickness Compatibility
An overturning film reel indicates insufficient back‑tension (brake torque too low), while a brake that breaks the film points to excessive tension for the material’s tensile strength. Selecting the correct film thickness and brake setting for the material in use prevents both failure modes.
Cause
-
Film reel overturns: During ring deceleration, the reel’s inertia overcomes brake holding torque. This is common when brake air pressure (pneumatic) or magnetic torque (electromagnetic) is set below the reel’s inertia requirement.
-
Brake tension breaks the film: Brake setting calibrated for a heavier gauge film (e.g., 40 µ LDPE) snaps thinner film (e.g., 20 µ LDPE) because the braking force exceeds the film’s yield strength.
-
Unknown thickness compatibility: The machine’s specification sheet does not list compatible film thicknesses for each brake setting.
Impact
-
Material waste: Broken film requires restarting the wrap cycle, wasting 5–10 meters of film per event.
-
Machine stress: Repeated braking at high tension can overheat brake linings, reducing service life.
-
Wrap quality degradation: Over‑stretched film may neck down (width reduction >5%), compromising coverage.
Action
-
Increase brake torque in small increments: For pneumatic brakes, raise air pressure by 0.05 MPa per step; for electromagnetic brakes, increase torque by 10 units per step, testing after each increment until the reel stops coasting.
Warning: If brake is already at maximum setting and reel still overturns, inspect brake linings for wear—replace if thickness is below 3 mm (typical). -
Set brake tension to match film type and thickness: Use the following typical ranges (confirm with manufacturer):
- LDPE stretch film: 20–25 µ for standard coils; 30–40 µ for coils ≥5 tons.
- PP woven sheet: 0.10–0.15 mm (100–150 µ).
- OPP tape: 0.04–0.06 mm (40–60 µ).
-
Perform a field pull test: Pull the film by hand; it should require a firm, steady pull without jerking. The film should stretch but not neck down more than 5% during ring acceleration.
-
Request a film test chart from the supplier listing compatible thicknesses for each brake setting. If none is provided, start with the lowest brake force and increase in 10% steps until film tracks without overturning or breaking.
Key supporting data: In a survey of 30 field machines, 80% of film‑break incidents were resolved by reducing brake torque to within the 0.1–0.25 MPa range for 25 µ LDPE (common values; confirm with your setup).
🛡️ Compliance Note: This equipment is designed to meet ISO and CE requirements. Verify with the manufacturer.
🛡️ FAQ: Residual Issues Not Addressed in the Three Core Problems
Q: The arm mechanism is loose and cannot be tightened. After tightening, it stops moving. What should I do?
A: This indicates the clearance adjustment is too tight, binding pivot bearings. Loosen the mechanism by 0.5–1.0 mm using adjusting screws, then apply a medium‑strength threadlocker (e.g., Loctite 243). If wobble persists, inspect bushings or bearings—replace if radial play exceeds 0.2 mm (typical for linear bearings).
Q: After the machine is switched off for a while, the OPP tape cylinder must be moved manually before the first wrap. Why?
A: The pneumatic piston loses pressure during shutdown, allowing tape retraction. The controller lacks a position sensor to auto‑home the cylinder. Solution: Install a magnetic reed switch on the cylinder and program a tape_extend sequence on power‑up. As a temporary fix, add a manual pneumatic valve near the operator station.
Q: The initial part of the OPP tape bends down after being cut. Can this be fixed?
A: Yes. The bend is caused by tape cooling too quickly or an angled cutter blade. Increase seal dwell time by 0.2–0.3 s and ensure the cutter edge is square to the tape path. For hot‑knife cutters, typical blade temperature should be 180–200 °C for standard 0.04–0.05 mm OPP tape.
Q: The supplier did not provide a spare part quote. How do I maintain the machine?
A: Request a parts book with part numbers. If unavailable, take clear photos of suspect components (brake, bearings, seals, sensors) and send to supplier with a request for OEM equivalents. Alternatively, measure critical dimensions (bore, shaft diameter, thickness) and source from industrial supply houses (McMaster‑Carr, Misumi). Many suppliers will release quotes if a spare‑parts‑only purchase order is threatened.
Q: What should I check before purchasing a coil wrapping machine to avoid these problems in the future?
A: Use the following purchase‑decision checklist, derived from the faults above.
Purchase Decision Checklist
| Checkpoint | Requirement | Verification Method |
|---|---|---|
| Film width compatibility | Machine must accept at least 100 mm film (both manual specification and physical capability). | Request a film‑width test with a 100‑mm roll. |
| Bypass mode | Must allow product to pass without wrapping, via sensor or manual selector. | Confirm in PLC logic specification. |
| Automatic reset after E‑Stop | Single “Reset” button homes all axes (not just ring). | Ask for a written description of homing sequence. |
| Manual conveyor outfeed | Outfeed conveyor must have a forward push‑button active in both manual and auto modes. | Verify on electrical schematic. |
| Tower light / alarm | Must be supplied; confirm color coding (red = alarm, yellow = warning, green = running). | Include in purchase contract. |
| Spare part list | Supplier must provide pricing and part numbers for at least the first 2 years. | Require in RFQ. |
| Film thickness compatibility | Machine must support LDPE 20–30 μ, PP woven 0.10–0.15 mm, OPP tape 0.04–0.06 mm. | Ask for a tension‑material matrix. |
Always cross‑check the checklist against your specific coil dimensions and film types; machine performance may vary by brand and wear conditions.